by Alexey V. Ivchenko
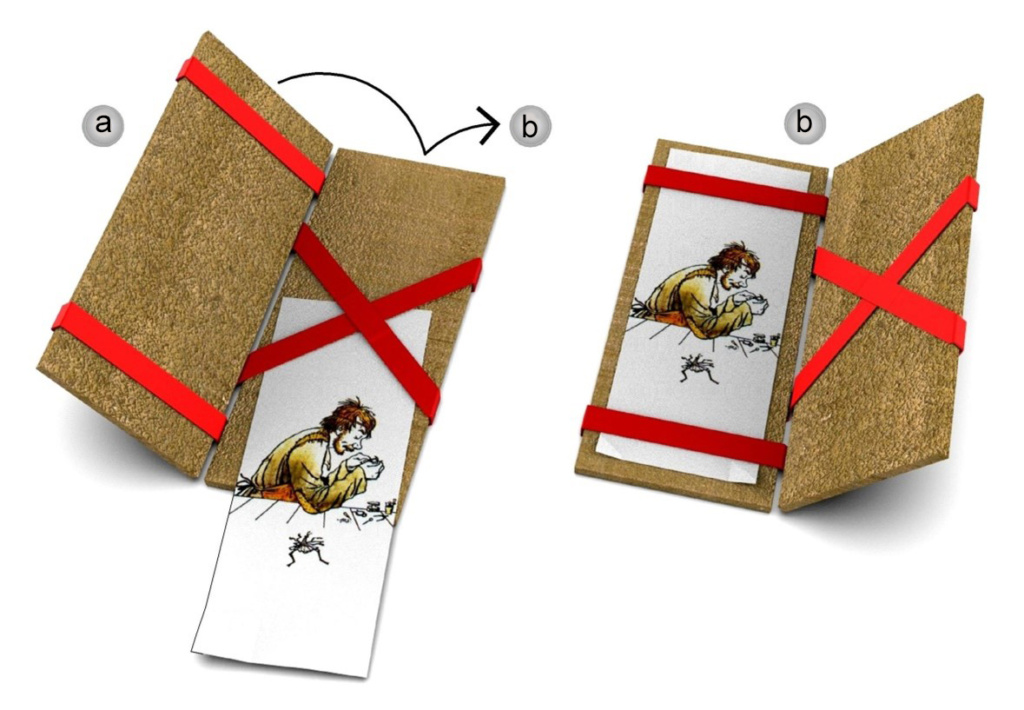
Put a paper bill or a picture in the crossed ribbons compartment, close the wallet, and open it from the other side. You will now see your picture in the compartment with the parallel ribbons. This trick has been around for centuries, and we will show you how to make it at home.
. You will need
- 4 identical rectangles made of cardboard or some other firm material. These should be just a little larger the size paper currency in the country where you live.
- Ribbons—these will be used to construct our reversible hinge joint.
- Glue
First, you need to connect the two cardboards in the rear of Fig. 2 with ribbons. The ribbons should be glued as shown in Fig, 1(b).
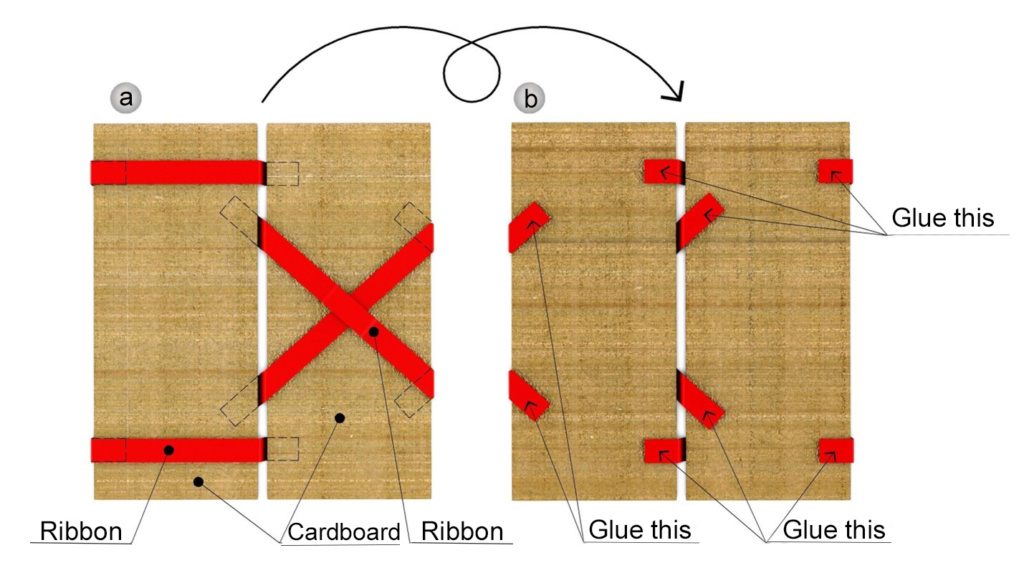
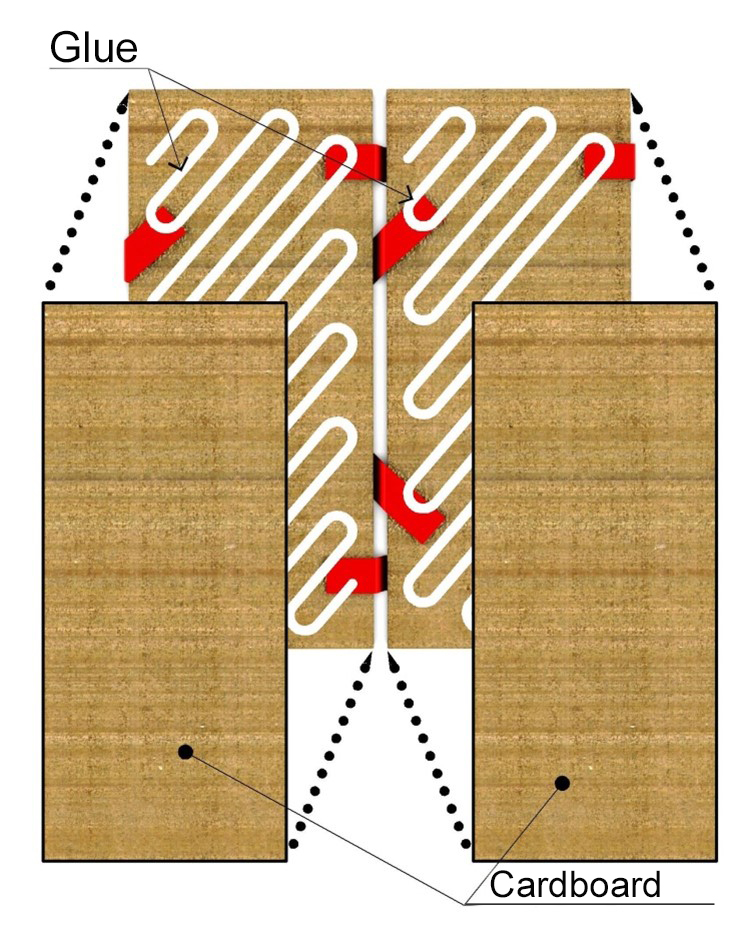
In order to give your wallet a finished look, we suggest that you glue the remaining two pieces of cardboard (front of Fig. 2) to the sides where the ends of the ribbons are visible.
That’s it! Let the glue dry and show your magic wallet off to your friends!
Here is a pdf version of this article. And if you want to know how the ideas discussed here were used to design a cutting edge airplane wing, read the full text by Alexey Ivchenko.